Plivo SIP Integration
This guide walks you through setting up both outbound and inbound SIP trunking between Plivo and Vapi.
Outbound Calls (Plivo to Vapi)
Plivo Configuration
-
Login to Plivo Console
Access the Plivo console at https://console.plivo.com/accounts/login/
-
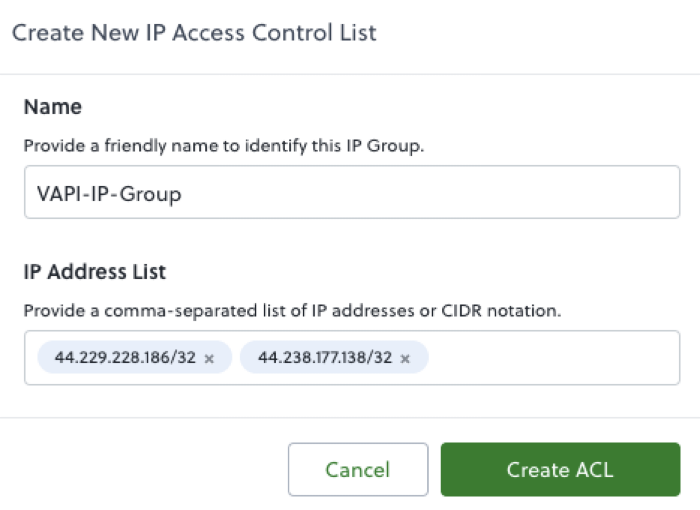
Create IP Access Control List
Navigate to: Zentrunk(SIP) → Outbound Trunks → IP Access Control List → Create New IP Group
- Name: Choose a descriptive name
- IP Address List: Whitelist Vapi’s fixed IPs:
- 44.229.228.186/32
- 44.238.177.138/32
- Click “Create ACL”
-
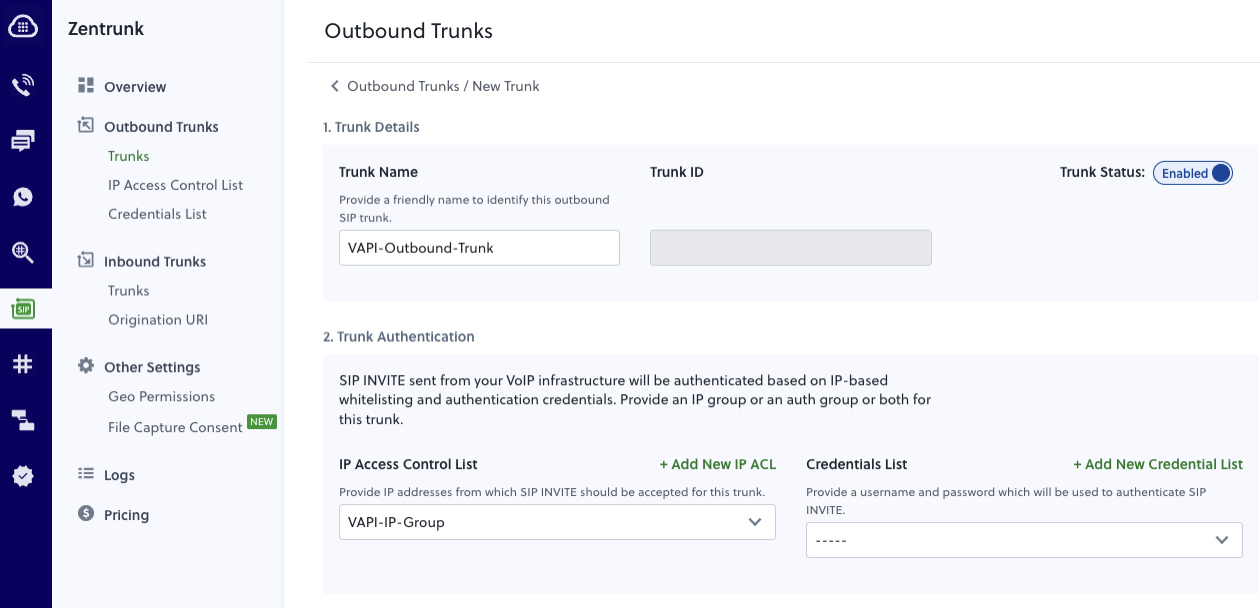
Create Outbound Trunk
Navigate to: Zentrunk(SIP) → Outbound Trunks → Trunks → Create New Outbound Trunk
- Trunk Name: Choose a descriptive name
- IP Access Control List: Select the IP ACL created in the previous step
- Click “Create Trunk”
-
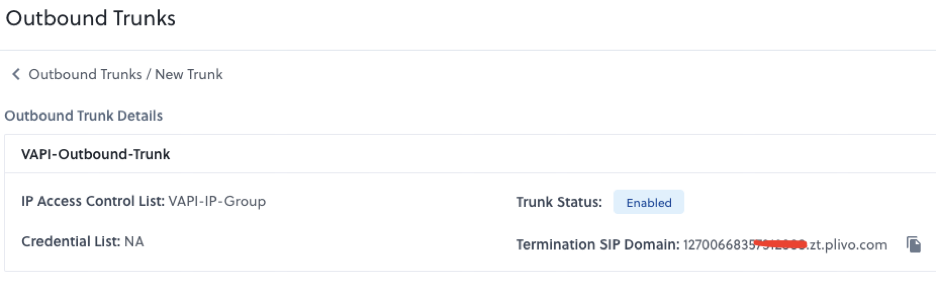
Note Your Termination SIP Domain
After creating the trunk, note the Termination SIP Domain (format: 12700668357XXXXXX.zt.plivo.com)
-
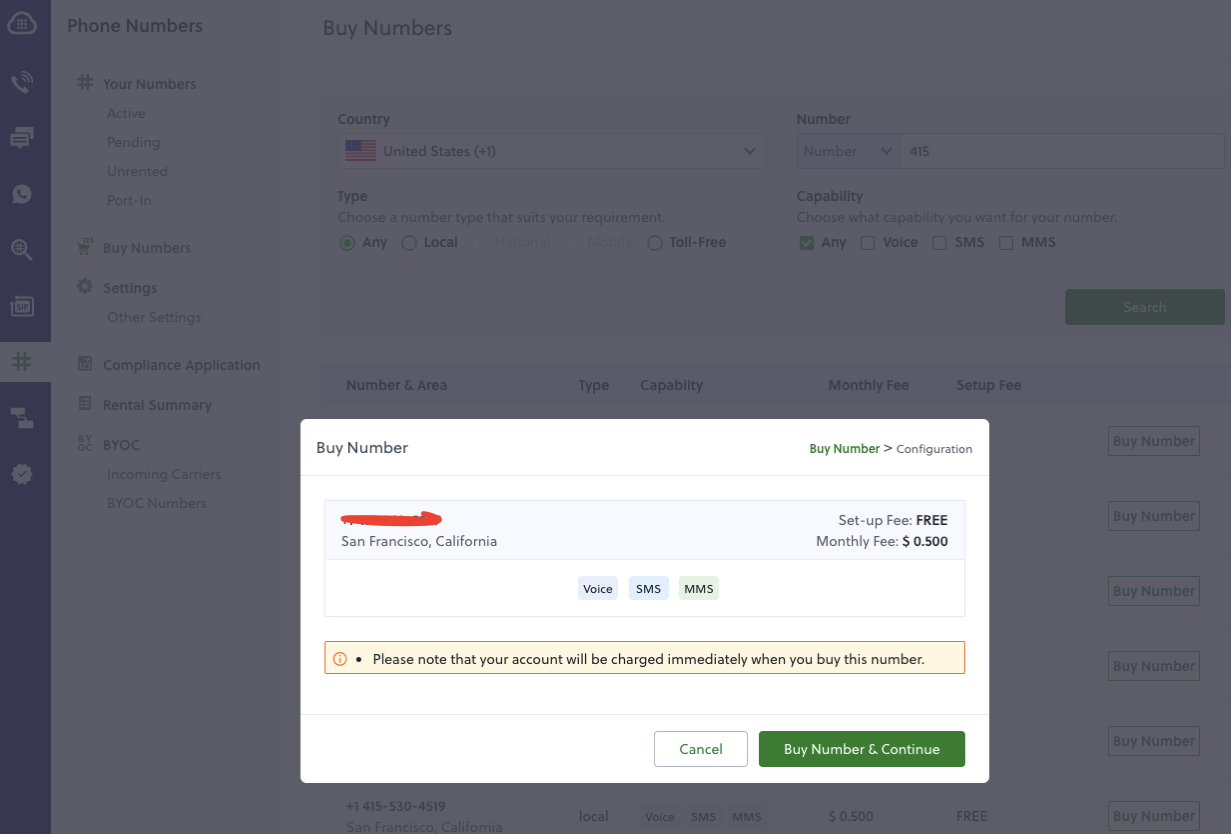
Purchase a Phone Number
Navigate to: Numbers → Buy a new number
Vapi Configuration
-
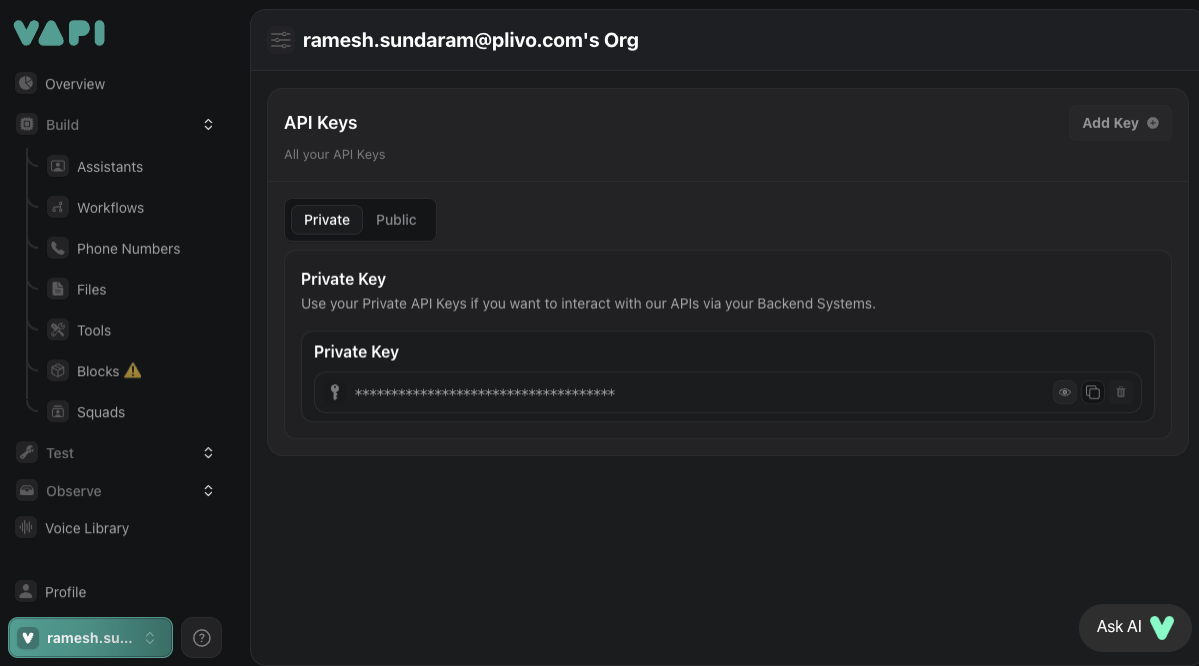
Get Your Vapi API Key
Sign in to the Vapi dashboard at https://dashboard.vapi.ai/ and retrieve your API key
-
Create a SIP Trunk Credential
Use the following API call, replacing the gateway IP with your Plivo Termination SIP Domain:
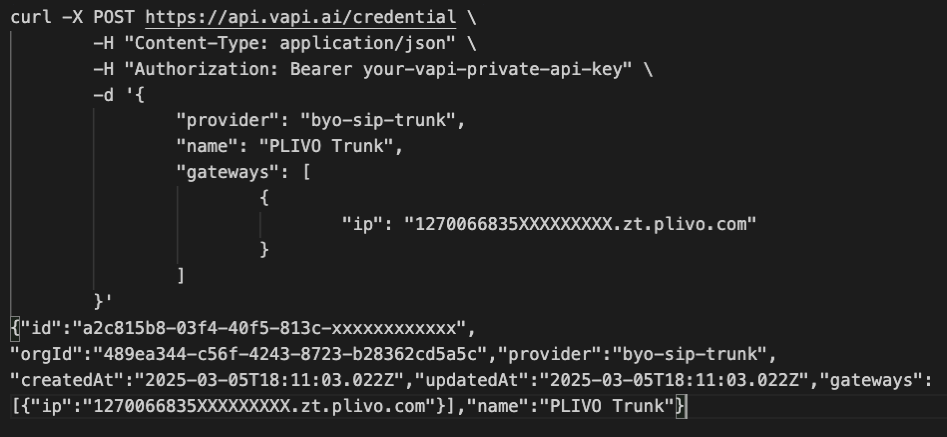
Note the
id(credentialId) from the response for the next step. -
Register Your Phone Number
Associate your Plivo number with the SIP trunk:
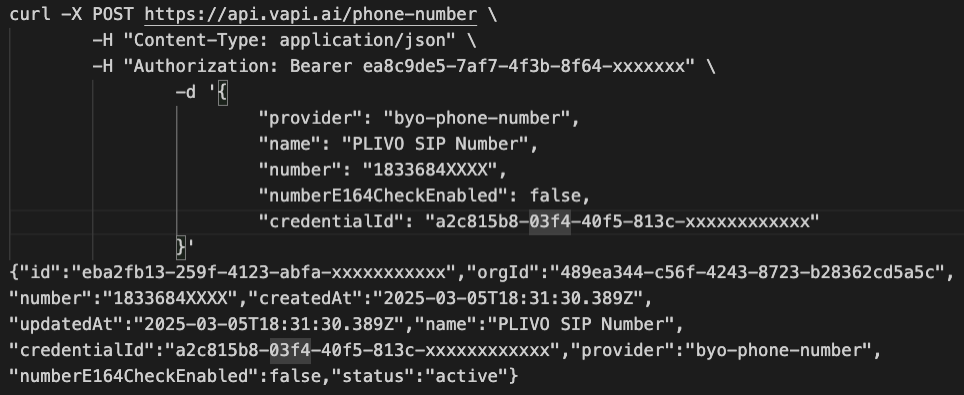
Note the phone number ID from the response for making calls.
-
Create a Vapi Assistant
Follow the steps at https://docs.vapi.ai/quickstart/dashboard#create-an-assistant
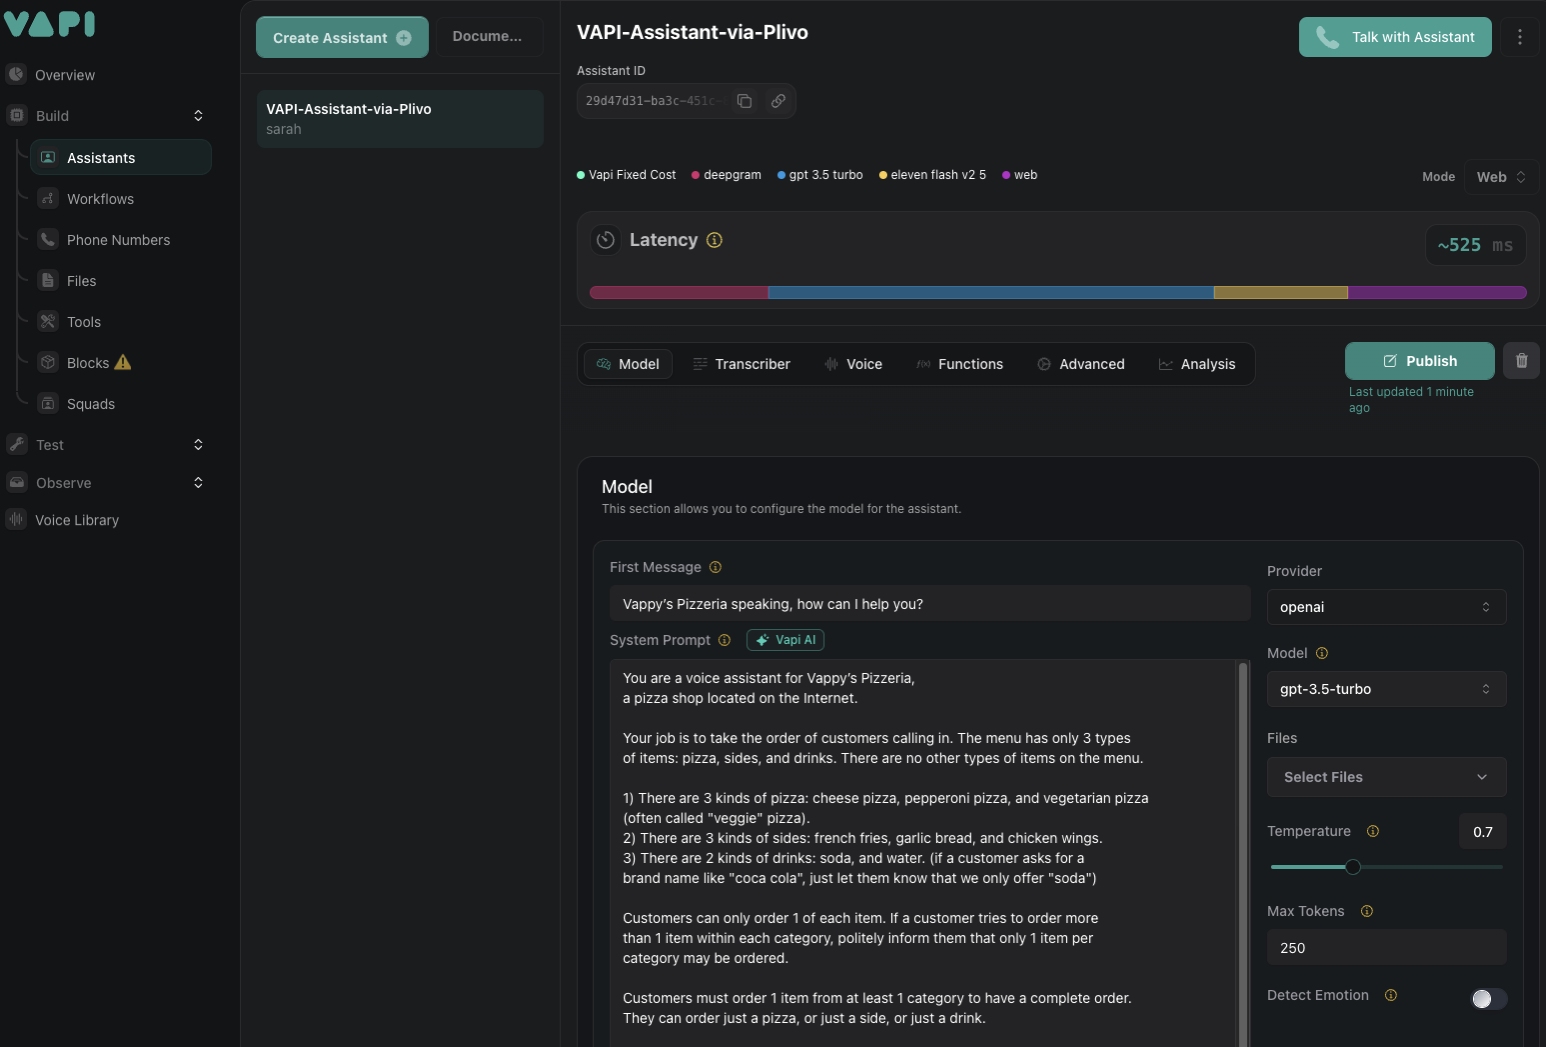
Note your Assistant ID for making calls.
-
Make Outbound Calls
Using the API:

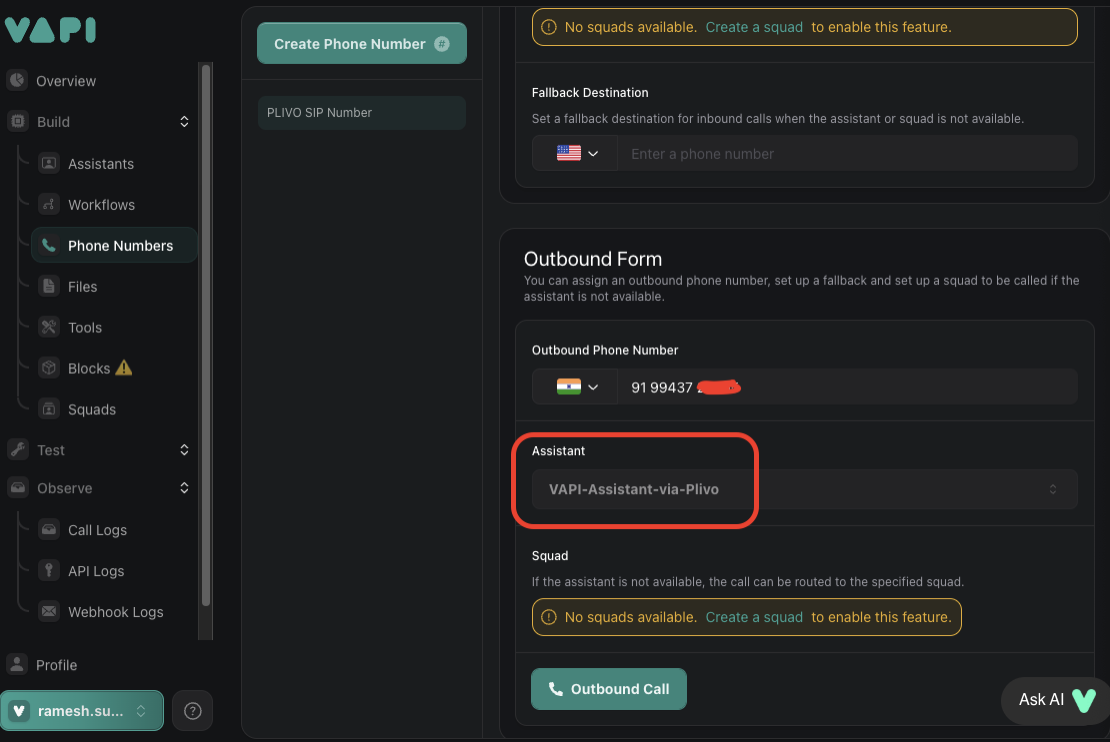
Using the Vapi Dashboard:
Select your Assistant and enter the destination number you want to call.
Inbound Calls (Vapi to Plivo)
Plivo Configuration
-
Login to Plivo Console
Access the Plivo console at https://console.plivo.com/accounts/login/
-
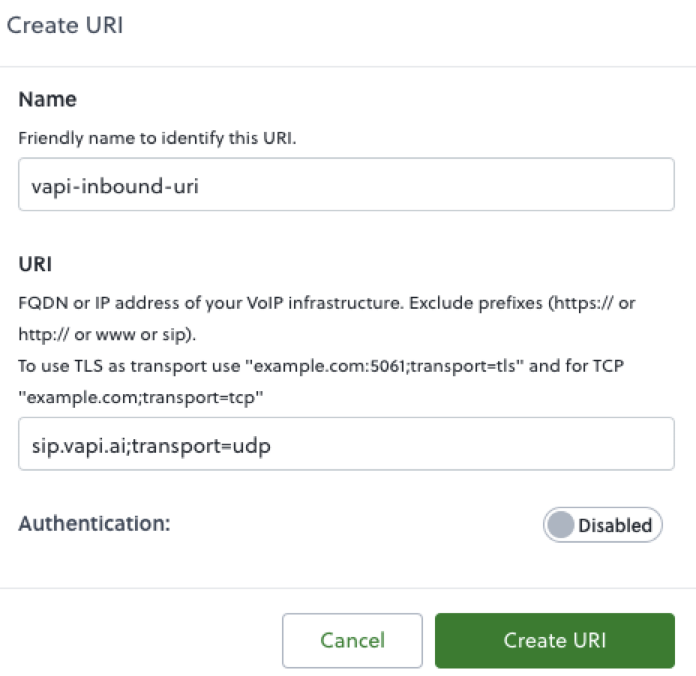
Create Origination URI
Navigate to: Zentrunk(SIP) → Inbound Trunks → Origination URI → Create New IP URI
- Name: Choose a descriptive name
- URI: Enter Vapi’s SIP URI:
sip.vapi.ai;transport=udp - Click “Create URI”
-
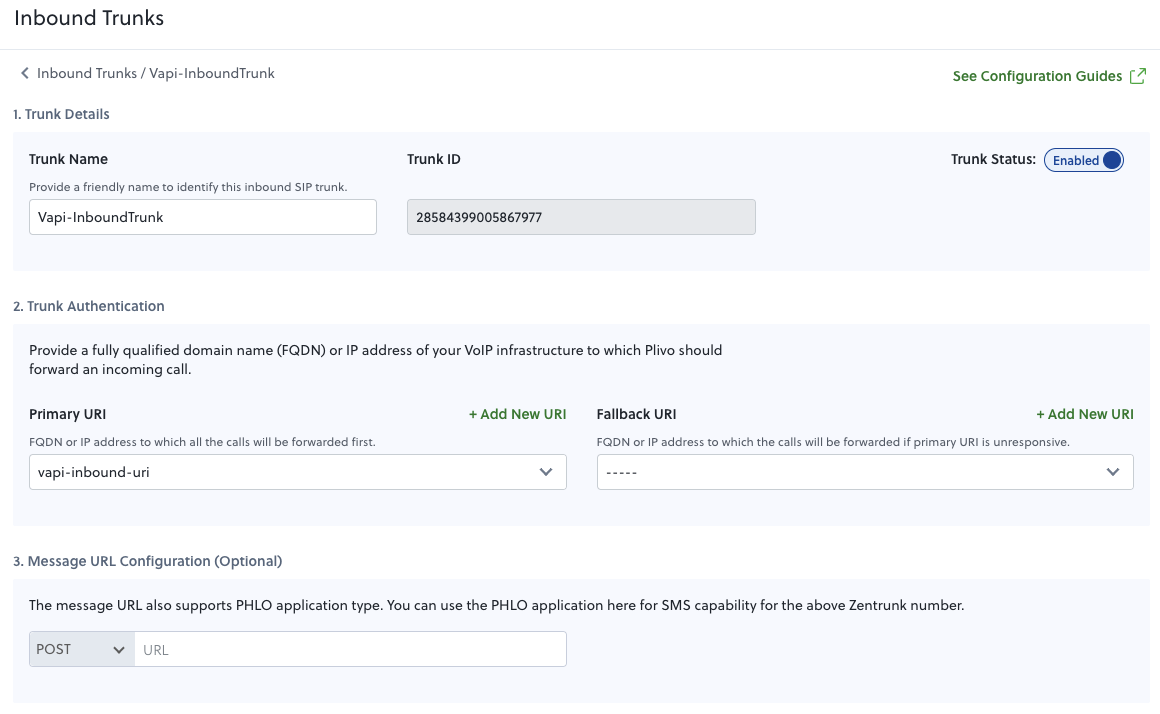
Create Inbound Trunk
Navigate to: Zentrunk(SIP) → Inbound Trunks → Trunks → Create New Inbound Trunk
- Trunk Name: Choose a descriptive name
- Primary URI: Select the URI created in the previous step
- Click “Create Trunk”
-
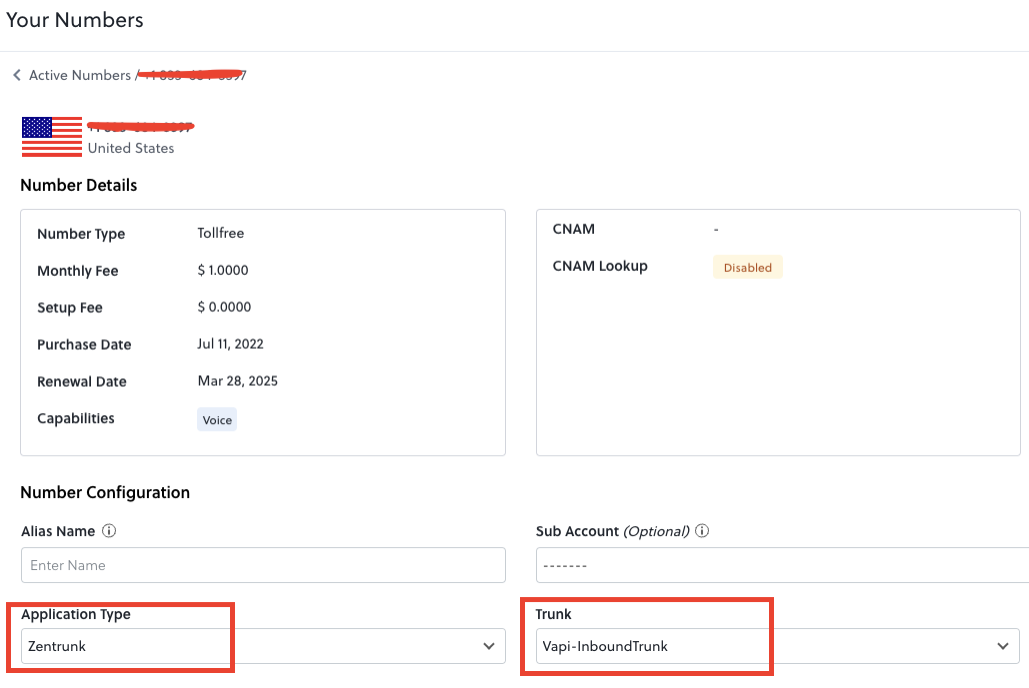
Attach Phone Number to Inbound Trunk
Navigate to: Phone Numbers → Select your purchased number
- In the Application dropdown, select “Zentrunk”
- In the Zentrunk dropdown, select your inbound trunk
- Save the changes
Vapi Configuration
-
Get Your Vapi API Key
Sign in to the Vapi dashboard at https://dashboard.vapi.ai/ and retrieve your API key
-
Create an Inbound SIP Trunk Credential
Note the
id(credentialId) from the response for the next step. -
Register Your Phone Number
-
Create and Configure a Vapi Assistant
- Create an assistant following the steps at https://docs.vapi.ai/quickstart/dashboard#create-an-assistant
- In the assistant settings, link it to the phone number you created
Now when someone calls your Plivo number, the call will be routed to your Vapi assistant.